
Dimmer Switch Requirements for Kitchen Island Pendant Lighting
Addressing the dimmer switch requirements for kitchen island pendant lighting is essential for achieving both task-oriented visibility and evening ambiance. Many homeowners overlook the technical compatibility between modern light fixtures and wall controls, often leading to flickering or premature bulb failure.
By understanding the electrical load, bulb type, and switch technology, you can ensure your kitchen remains both functional and inviting. This article covers the specific factors you need to evaluate to select the right hardware for your space, ensuring your lighting setup performs reliably for years to come.
Understanding Electrical Load and Dimmer Compatibility

The most critical factor when selecting a dimmer for your kitchen island pendant lighting is ensuring the switch is rated for the total wattage of your fixtures. Every dimmer has a maximum load capacity, typically measured in watts for incandescent or halogen bulbs. If your pendant lights use LED technology, you must look for the “LED load rating,” which is often significantly lower than the standard incandescent capacity.
Exceeding the maximum wattage capacity of a dimmer can cause the switch to overheat, trip, or fail entirely. For a kitchen island with three pendants, each equipped with a 60-watt equivalent LED bulb, your total load is only 30-45 watts. Most modern dimmers can handle this easily, but you must verify that the switch is explicitly labeled as “LED/CFL compatible.”
Non-compatible dimmers often struggle with the electronic drivers inside LED bulbs. This incompatibility results in the dreaded strobe-like flickering or a buzzing noise that can be incredibly distracting.
Always check the packaging of your light fixtures for recommended dimmer types or manufacturer-approved lists. Many high-end lighting brands provide a PDF document on their website detailing exactly which dimmers have been tested to work with their specific products.
Single-Pole Versus Three-Way Dimmer Switches

Determining whether you need a single-pole or three-way dimmer depends on how many switches control your island lights. A single-pole switch is the standard choice if your kitchen island pendant lighting is controlled from only one location. If you can turn your kitchen pendants on or off from two different entry points, you require a three-way dimmer configuration.
Three-way setups are common in open-concept kitchens where you might enter from the living room or the hallway. In these cases, you will need a specialized dimmer that supports multi-location dimming. Some modern systems allow for one master dimmer and one or more remote “companion” dimmers that communicate to keep the light levels consistent.
If you are replacing an existing standard toggle switch, verify the wiring before purchasing your new hardware. A three-way switch will have three terminal screws, whereas a single-pole switch typically has only two. Taking a quick photo of the existing wiring configuration before disconnecting anything is a smart way to ensure you buy the correct replacement.
The Importance of LED Driver Compatibility

Modern pendant lighting often features integrated LED technology rather than replaceable bulbs. When the LED driver is built into the fixture, the dimmer must be compatible with that specific driver’s dimming protocol. Most residential fixtures use Phase-Cut or TRIAC dimming, which is standard for most home improvement store switches.
Some high-end or commercial-grade pendants require 0-10V dimming systems. This is a different technology that uses a separate low-voltage signal wire to control the intensity of the light. If your fixtures require 0-10V dimming, a standard wall dimmer will not function, and you may need to consult with a licensed electrician to install the appropriate control wiring.
Always read the technical specifications included with your pendant lights before finalizing your hardware purchase. If the spec sheet mentions “0-10V dimming,” do not attempt to use a standard TRIAC dimmer, as it will likely result in the light not turning on at all.
Following the U.S. Department of Energy guidelines on lighting can help you understand the efficiency benefits of these advanced systems.
Matching Dimmer Technology to Bulb Types
The internal components of your light bulbs dictate the type of dimmer you should install. Incandescent and halogen bulbs are resistive loads, which are the simplest to dim. LED bulbs, however, are capacitive loads that require specific “Leading Edge” or “Trailing Edge” dimming technologies.
Trailing-edge dimmers, also known as reverse-phase dimmers, are generally the best choice for modern LED pendant lights. They provide a smoother dimming curve and are less likely to cause buzzing. Leading-edge dimmers are older technology designed primarily for incandescent bulbs and often cause issues when paired with sensitive LED electronics.
If you are unsure about your bulb type, look for the “Dimmable” label on the packaging. Never attempt to dim a non-dimmable LED bulb, as it can cause the internal components of the bulb to overheat and potentially create a fire hazard. If you have a mixture of bulbs in your pendants, ensure they are all from the same manufacturer to maintain consistent dimming behavior.
Installation Requirements and Safety Standards

Installing a dimmer switch for your kitchen island pendant lighting requires basic electrical knowledge and strict adherence to safety protocols. Always turn off the power at the main circuit breaker before opening any wall plates. Use a non-contact voltage tester to confirm that the power is truly off before you touch any wires.
You will typically find three wires inside the wall box: the hot wire (black), the neutral wire (white), and the ground wire (green or bare copper). Some older homes may not have a neutral wire in the switch box, which limits your choice of smart dimmers. If you are installing a modern smart dimmer, check the manufacturer’s requirements regarding the necessity of a neutral wire.
Ensure all wire connections are secure using appropriate wire nuts or push-in connectors. A loose connection can create resistance, leading to heat buildup behind the wall plate. If you are uncomfortable working with electrical wiring, hiring a qualified electrician is a small price to pay for peace of mind and code compliance.
Visualizing the Impact of Dimming Levels

The ability to adjust your kitchen island pendant lighting is about more than just energy savings; it is about setting the mood. A bright, cool light is ideal for meal preparation and cleaning, while a warm, dimmed glow is perfect for entertaining or late-night kitchen visits. When planning your lighting, aim for a dimmer that offers a wide range of adjustment.
Some dimmers allow you to set a “minimum light level” trim adjustment. This is a crucial feature if your LEDs begin to flicker when dimmed to their lowest point. By adjusting the trim, you can set the lowest reachable level of the bulb to the point just before it starts to flicker, ensuring a smooth transition across the entire range.
Consider the following table when planning your lighting intensity for various kitchen activities:
| Activity | Recommended Intensity | Color Temperature |
|---|---|---|
| Food Preparation | 80% – 100% | 3000K – 4000K |
| Casual Dining | 40% – 60% | 2700K – 3000K |
| Evening Ambiance | 10% – 30% | 2200K – 2700K |
Common Pitfalls in Dimmer Selection
One of the most frequent mistakes homeowners make is buying a dimmer based solely on its appearance rather than its electrical specifications. While a beautiful designer wall plate can enhance your kitchen’s aesthetic, the internal mechanism is what dictates performance. Always prioritize the compatibility chart provided by the light fixture manufacturer.
Another error is mixing different brands of LED bulbs on the same dimmer circuit. Even if all bulbs are labeled as “dimmable,” their internal drivers may react differently to the dimmer’s signal. This often results in one pendant appearing brighter than the others, or one bulb flickering while the rest remain steady.
Finally, avoid overloading a single dimmer with too many pendant lights. While a single kitchen island usually has two or three pendants, some larger designs utilize five or more. Calculate the total wattage of all fixtures combined and ensure it remains well below the maximum capacity of your chosen dimmer switch.
Smart Dimmer Integration and Modern Features

Smart dimmers have become increasingly popular for kitchen island pendant lighting due to their added functionality. These devices can be controlled via smartphone apps, voice assistants, or automated schedules. They offer the ability to create “scenes,” where your island lights automatically dim to a specific level at a certain time of day.
When choosing a smart dimmer, consider the connectivity protocol. Wi-Fi-enabled dimmers are easy to install but can put a strain on your home network if you have many devices. Zigbee or Z-Wave dimmers are more robust and create a mesh network, which is often more reliable for smart home enthusiasts.
Smart dimmers also provide energy monitoring features. You can track exactly how much power your pendant lights are consuming over time. This data can encourage more efficient usage, helping you lower your utility bills while extending the lifespan of your LED bulbs.
Troubleshooting Flickering and Buzzing
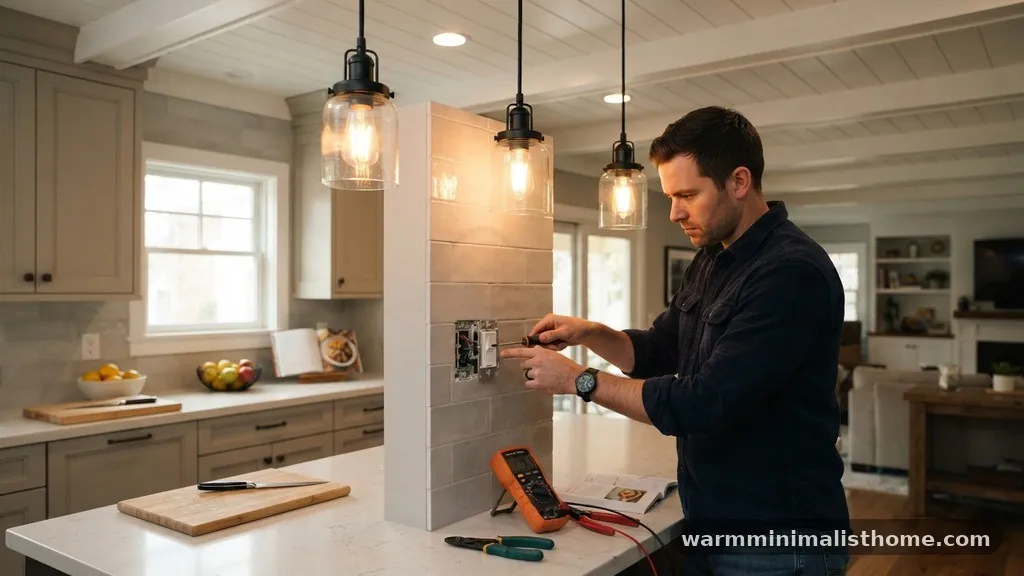
If you have already installed a dimmer and your kitchen island pendant lighting is flickering, do not ignore it. Flickering is a sign that the dimmer and the LED driver are not communicating effectively. Start by checking the “dimming range” settings on the switch if it is a programmable model.
Buzzing sounds are often caused by the rapid switching of current within the dimmer or the LED driver. This is common with lower-quality dimmers that aren’t specifically designed for LED loads. If you hear a hum, it is usually a sign that you should upgrade to a higher-quality, LED-rated dimmer switch.
If the problem persists after replacing the switch, the issue may lie with the light fixture itself. Some integrated LED fixtures have non-compatible drivers that simply cannot be dimmed. In this scenario, you may need to replace the fixture or accept that it cannot be dimmed without significant modifications.
Planning the Aesthetic and Spacing
While the technical requirements of dimmer switches are paramount, the placement and style of your pendants matter just as much. For a standard 8-foot island, two or three pendants are generally the right choice. Space them evenly to ensure consistent light distribution across the entire surface.
The height of the pendants should be approximately 30 to 36 inches above the countertop. This height prevents the bulbs from being at eye level, which would create glare even if the lights are dimmed. When you have multiple pendants, use a single dimmer to control them all simultaneously to maintain a balanced look.
Consider the size of your kitchen when selecting your pendants. Large, oversized pendants can overwhelm a small kitchen, while tiny pendants might get lost in a large, open-concept space. Use the following list as a guide for your planning process:
- Measure your kitchen island length to determine the number of pendants needed.
- Ensure the total wattage of all pendants is within the dimmer’s rated capacity.
- Select bulbs with the same color temperature (Kelvin) for a uniform appearance.
- Use a dimmer with a trim adjustment feature to prevent low-end flickering.
- Consider a smart dimmer if you want voice control or automated scheduling.
Frequently Asked Questions
Do all pendant lights require a special dimmer?
No, not all pendant lights require a special dimmer, but they do require a compatible one. If your pendants use traditional incandescent bulbs, a standard dimmer will work. If they use LEDs, you must use an LED-rated dimmer to avoid performance issues.
Why do my LED pendant lights flicker when I dim them?
Flickering usually occurs because the dimmer switch is not compatible with the specific LED driver in your fixture. It can also happen if the total load on the dimmer is below its minimum requirement. Adjusting the dimmer’s trim settings or upgrading to a high-quality, LED-specific switch often solves the problem.
Can I mix different brands of light bulbs on one dimmer?
It is strongly recommended to avoid mixing brands of LED bulbs on the same circuit. Different manufacturers use different internal drivers, which will react differently to the dimming signal. This leads to inconsistent light levels and potential flickering.
What is the difference between a leading-edge and trailing-edge dimmer?
Leading-edge dimmers are older technology designed for incandescent lighting and cut the beginning of the electrical wave. Trailing-edge dimmers are modern technology designed for LEDs and cut the end of the wave, providing a much smoother and quieter dimming experience for modern fixtures.
How do I know if my pendant lights are dimmable?
Always check the product packaging or the manufacturer’s spec sheet. If a fixture is not explicitly labeled as “dimmable,” attempting to use a dimmer switch will result in failure, flickering, or damage to the fixture’s internal electronics.
Conclusion
Selecting the correct dimmer switch requirements for kitchen island pendant lighting is a vital step in creating a balanced and functional home environment. By prioritizing compatibility between your light fixtures and the control hardware, you eliminate common issues like flickering and buzzing. Whether you opt for a basic mechanical dimmer or a sophisticated smart home solution, the focus should remain on electrical safety and load capacity.
Taking the time to research your specific bulb and driver types will pay off in the long run with reliable performance and the perfect ambiance for your kitchen. We invite you to assess your current setup and make the necessary upgrades to enjoy the full potential of your lighting design.