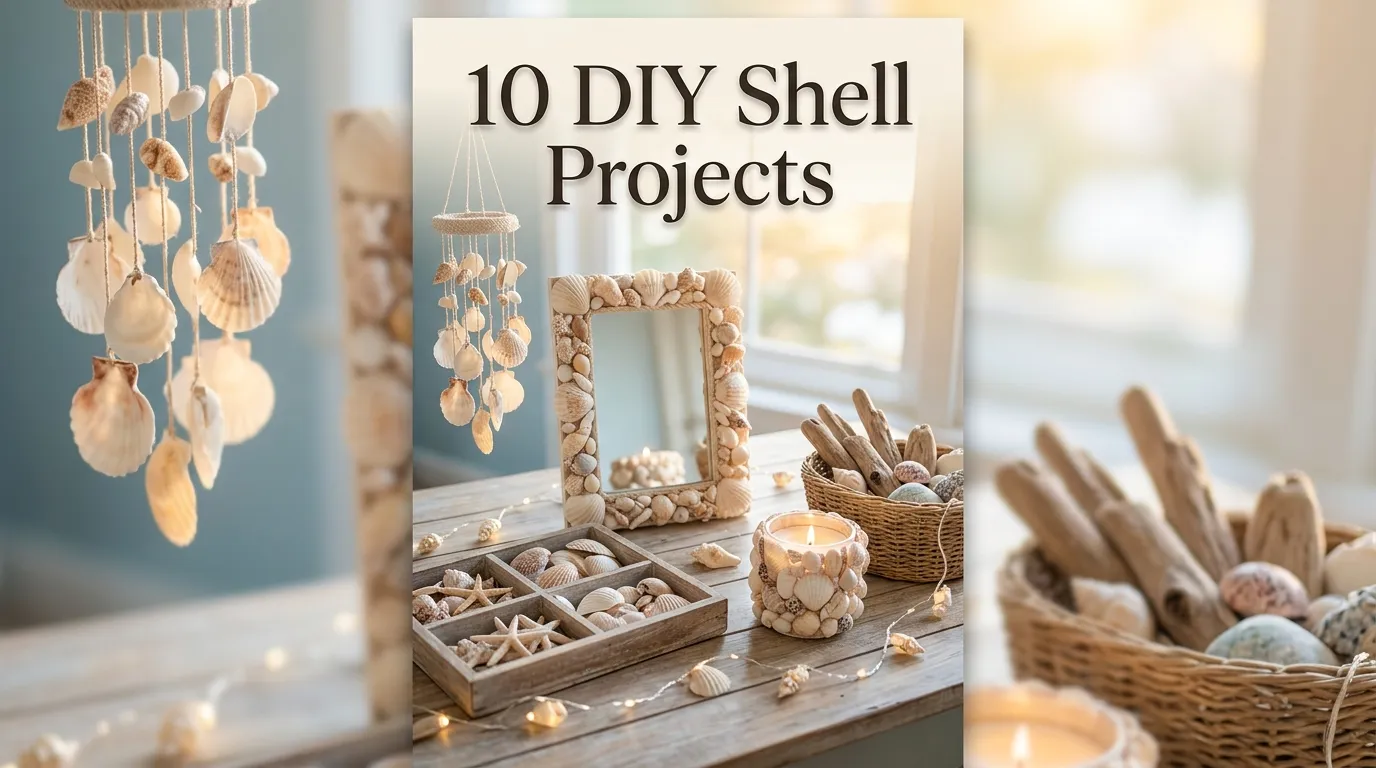
10 DIY Shell Projects
If you’ve ever come home from a beach trip with a bag of shells and no real plan for them, you’re not alone. In my experience, most shell collections end up sitting in a jar on a shelf, admired for a week and then forgotten. That’s a shame, because shells are one of the most versatile natural materials you can decorate with. They’re free (or nearly free), they photograph beautifully, and they carry a kind of quiet, lived-in charm that manufactured coastal decor rarely matches.
I’ve noticed that homeowners often assume “shell decor” means a tacky souvenir shop look — plastic starfish glued to a mirror frame. It doesn’t have to. When shells are used with restraint and paired with natural materials like linen, wood, and rope, they read as intentional, collected, and genuinely designer-level. A mistake many homeowners make is using too many shells at once, which flattens the effect instead of elevating it.
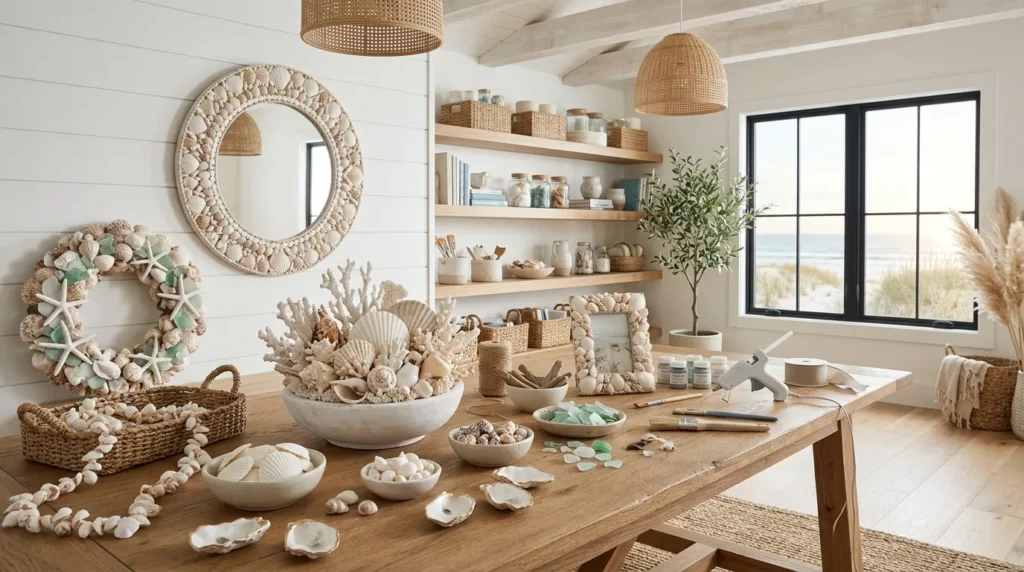
This article walks through ten practical, budget-friendly shell projects you can realistically finish in an afternoon or a weekend. Each one includes the reasoning behind why it works in a real home, plus specific guidance on materials, layout, and styling so the result looks curated rather than crafty. Whether you live near the coast or you’re simply drawn to that relaxed, sun-washed aesthetic, these ideas will give your space texture and personality without requiring a full redecorating budget.
Table of Contents
- Shell Photo Frames — Turning everyday frames into textured keepsakes.
- Coastal Shell Wreaths — A door accent that works well beyond summer.
- Layered Shell Vignettes — Styling shells like a designer arranges objects on a shelf.
- Shell Mirror Accents — Adding texture to a mirror without overwhelming it.
- Painted Shell Ornaments — A seasonal project with year-round display potential.
- Shell Candle Clusters — Using shells as natural candle vessels and risers.
- Shell Wind Chimes — A porch project that adds sound as well as sight.
- Shell Table Runners — Dressing a dining table for warm-weather entertaining.
- Shell Napkin Rings — A small detail that makes table settings feel finished.
- Shell Planter Trim — Bringing coastal texture to potted plants and window boxes.
1. Shell Photo Frames
Quick Benefits
- Uses shells you already have on hand
- Costs under $10 in most cases
- Works with any existing frame style
- Makes a meaningful gift for beach-trip photos
- Adds texture without taking up extra shelf space
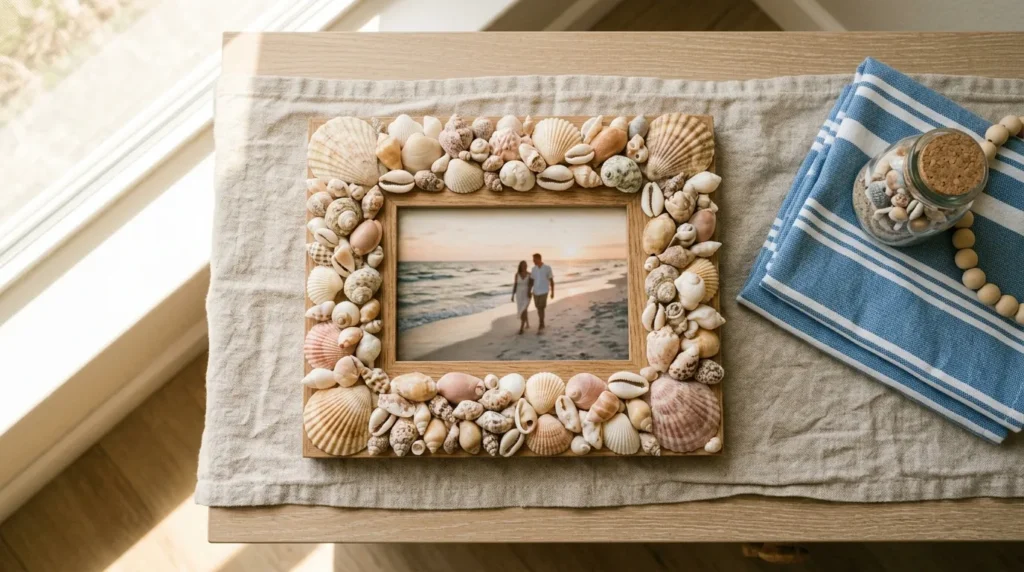
Why It Works A shell-covered frame works because it ties the object to the memory inside it. In my experience, this is one of the first projects people try, and it’s popular for a reason — it’s low-risk and forgiving. Uneven shell sizes and shapes actually help here, since the goal is texture, not precision. Framing a beach photo this way turns a simple keepsake into a small piece of art that feels personal rather than store-bought, which is exactly the kind of detail that makes a shelf or gallery wall feel collected over time instead of purchased in one trip.
How To Style It Start with a plain wood or MDF frame with a flat front edge, since curved or rounded frames make shell placement harder. Sort your shells by size before gluing so you can place the larger, more interesting pieces at the corners and fill in with smaller shells along the edges. A hot glue gun works fine, though E6000 adhesive holds better over time in humid rooms. Leave the inner edge closest to the photo bare so the frame doesn’t feel cluttered. Style it on a console table leaning against the wall rather than flat on a shelf — it catches light better and looks more like a display than an afterthought.
2. Coastal Shell Wreaths
Quick Benefits
- Refreshes a front door without a full redesign
- Works for both a beach house and an inland home
- Can be adjusted seasonally by swapping ribbon or greenery
- Provides strong visual impact for the effort involved
- Doubles as a statement piece for indoor walls too
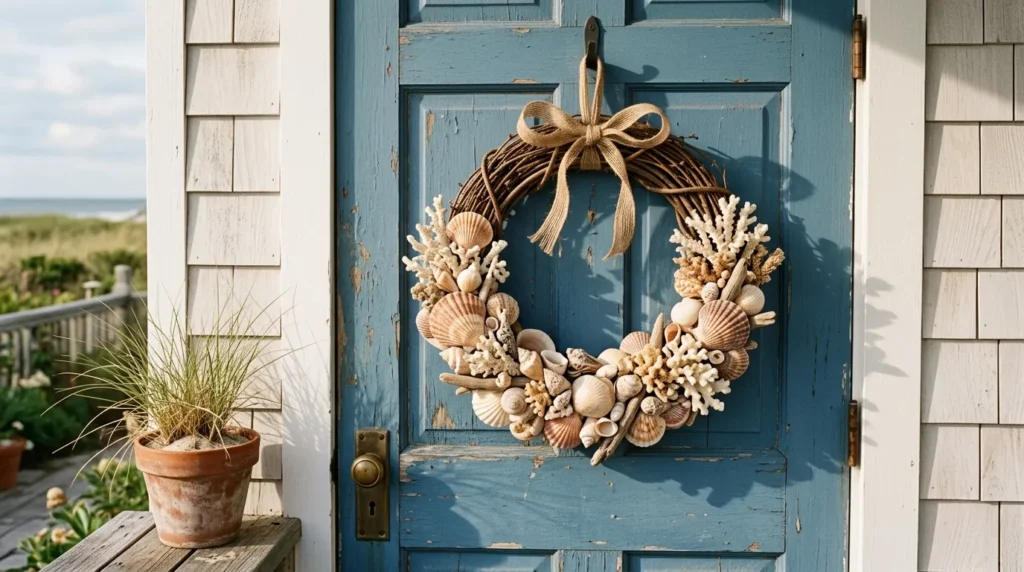
Why It Works A wreath is one of the highest-impact, lowest-effort ways to change how a home is perceived from the outside. I’ve seen this idea transform an entryway that otherwise had no personality at all. Shells bring an organic, sun-bleached quality that pairs surprisingly well with neutral ribbon and dried greenery, which keeps the look from feeling like a themed decoration and more like a natural material choice. Because shells are lightweight, the wreath stays easy to hang without needing reinforced hardware.
How To Style It Use a grapevine or straw wreath base rather than foam, since it gives a more natural silhouette and holds glue better. Group shells in clusters of three or five rather than spacing them evenly around the ring — clusters read as intentional, while even spacing can look mechanical. Mix in a few pieces of dried coral, sea glass, or driftwood if you have them, and finish with a simple jute or linen ribbon rather than anything glossy. Hang it at eye level on the door, or bring it indoors and lean it against a mirror or on a mantel for a softer, less literal coastal statement.
3. Layered Shell Vignettes
Quick Benefits
- No glue or tools required
- Easily rearranged whenever you want a refresh
- Works on bookshelves, console tables, or bathroom counters
- Costs nothing beyond the shells themselves
- Creates a designer “collected over time” look
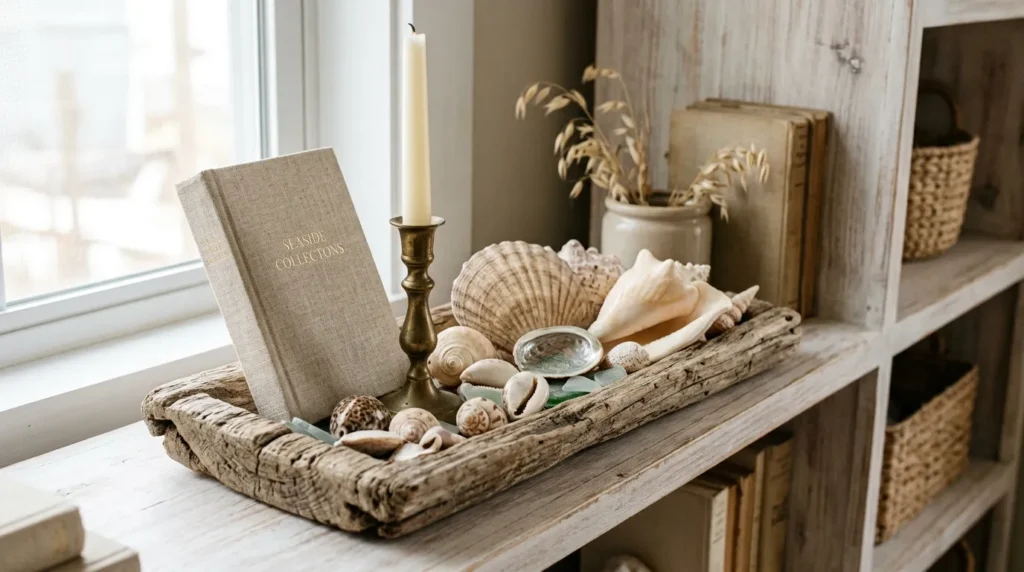
Why It Works This is the project I recommend most often to people who want coastal touches without committing to anything permanent. A vignette is simply a small, considered grouping of objects, and shells are ideal for this because their irregular shapes create natural visual interest. One simple trick I always suggest is grouping in odd numbers, since three or five objects photograph and display better than an even count. This approach also lets you edit the display seasonally, swapping shells for pinecones or dried florals without redoing the whole space.
How To Style It Choose a small tray, a shallow bowl, or a piece of driftwood as your base so the grouping feels contained rather than scattered. Layer heights by placing your tallest object — a candlestick, a small vase, or a piece of coral — toward the back, then work forward with progressively shorter items, finishing with a few loose shells at the front. Vary texture as much as shape: pair a smooth shell with a rough piece of driftwood and a soft linen-covered book for contrast. Keep the overall footprint small — a vignette that spreads too wide loses its intimate, curated feel.
4. Shell Mirror Accents
Quick Benefits
- Elevates a plain, builder-grade mirror
- Adds texture to an entryway or bathroom
- Works well with round, oval, or arched mirror shapes
- Requires only a handful of larger shells
- Creates a focal point without repainting or replacing anything
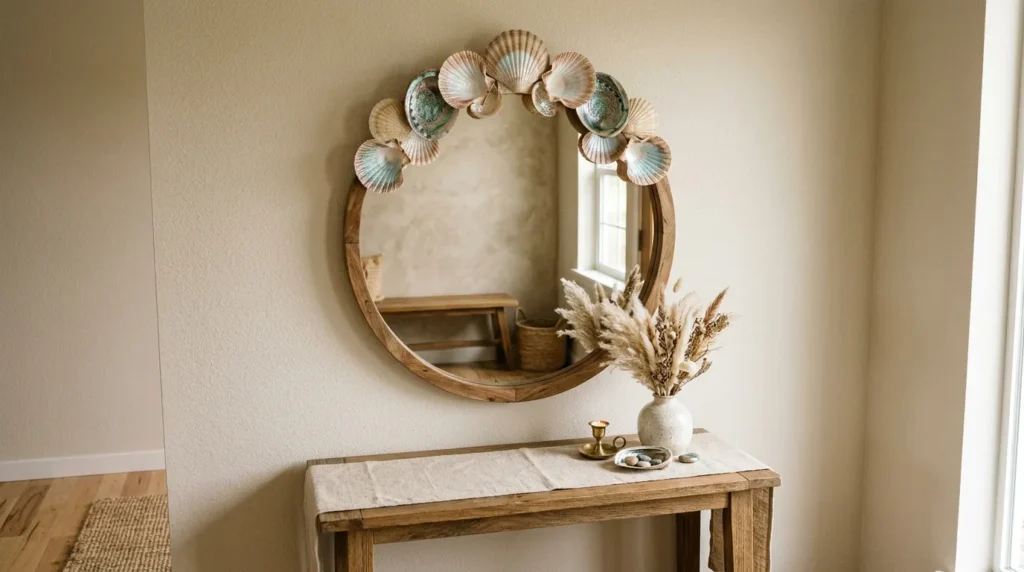
Why It Works That’s why many designers recommend accenting rather than fully covering a mirror frame — a few well-placed shells along the top or bottom edge draw the eye without turning the mirror into a craft project. This restraint is what separates a tasteful coastal accent from something that looks dated. Because mirrors reflect light, the natural texture and slight iridescence in shells like abalone or scallop catch the light beautifully, which makes this one of the more visually rewarding projects on this list relative to the effort involved.
How To Style It Choose 5 to 8 of your largest, most visually interesting shells rather than dozens of small ones. Arrange them along the top curve of the mirror or in a loose cluster at one bottom corner, using a strong adhesive like E6000 that dries clear and holds weight. Avoid full-frame coverage, which tends to look busy and can make the mirror feel smaller in the room. This works especially well in an entryway, above a console table, or in a powder room where a small mirror benefits from a bit of unexpected texture.
5. Painted Shell Ornaments
Quick Benefits
- A project that works for both kids and adults
- Doubles as gift tags or tree ornaments
- Uses inexpensive craft paint and a sealant
- Can be themed for any season or holiday
- Displays well in a bowl even outside of the holidays
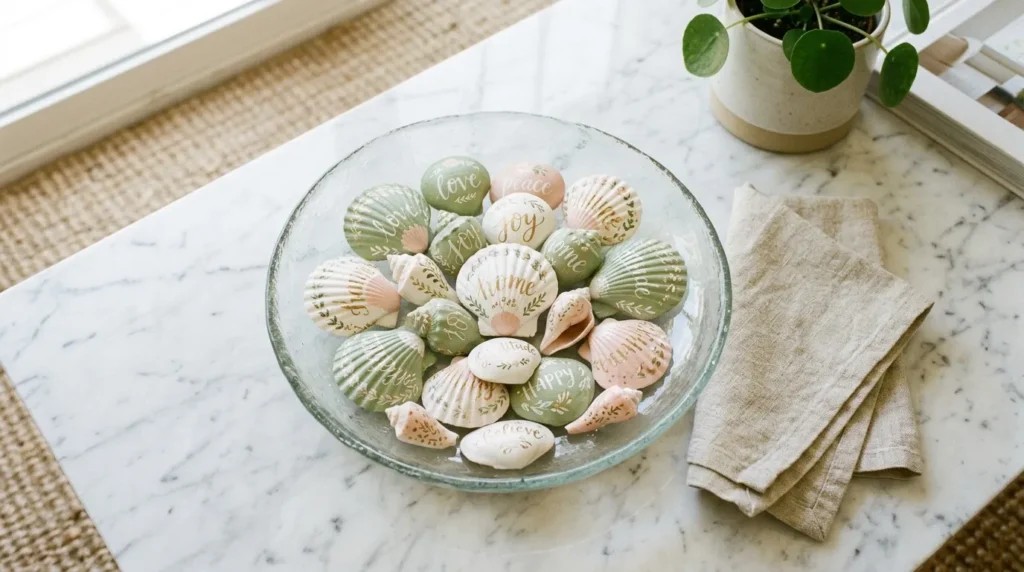
Why It Works Painting shells sounds simple, but the finished product often surprises people with how polished it can look. In my experience, a coat of matte white or soft sage paint with a hand-painted detail — a small monogram, a wave line, or a simple dot pattern — turns an ordinary shell into something that feels handmade in the best sense. This project also gives you a reason to use smaller, less impressive shells that wouldn’t otherwise make it into a display, since paint evens out imperfections in shape and color.
How To Style It Clean and fully dry your shells before painting, since any leftover sand or moisture will affect how the paint adheres. Acrylic craft paint works well, and a small detail brush is worth the investment if you plan to add fine lines or lettering. Seal with a matte varnish once dry to protect against chipping. Style painted shells in a low glass bowl on a coffee table, string a few with jute for hanging ornaments, or use them as place-card holders for a dinner party — the small scale makes them flexible for display well beyond a single season.
6. Shell Candle Clusters
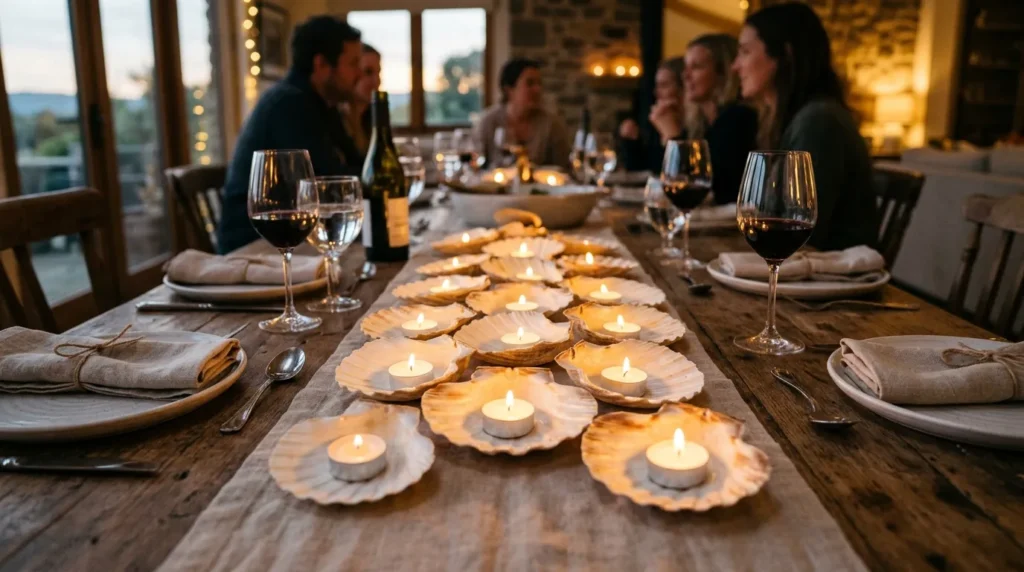
Quick Benefits
- Turns shells into functional candle vessels or risers
- Adds ambient, flattering light to a room
- Works for both tealights and taper candles
- Pairs naturally with driftwood and linen textures
- Ideal for outdoor entertaining as well as indoor use
Why It Works Using shells as candle holders is one of those ideas that looks far more sophisticated than the effort required to create it. A mistake many homeowners make is scattering candles randomly around a table; grouping them with shells as a base or riser gives the eye a clear resting point. The reflective, slightly curved interior of larger shells like clams or scallops also catches candlelight in a way that flat holders don’t, creating a soft glow that flatters a room in the evening far more than overhead lighting does.
How To Style It Larger, bowl-shaped shells can hold a small tealight directly, while flatter shells work best as risers underneath glass hurricanes or pillar candles. Cluster three to five shells of varying sizes down the center of a dining table rather than spacing them evenly, and mix in a few unlit shells purely for texture. For outdoor entertaining, citronella tealights nested in shells double as both decor and mosquito deterrent. Always place a small dish or tray underneath to protect wood surfaces from wax drips.
7. Shell Wind Chimes
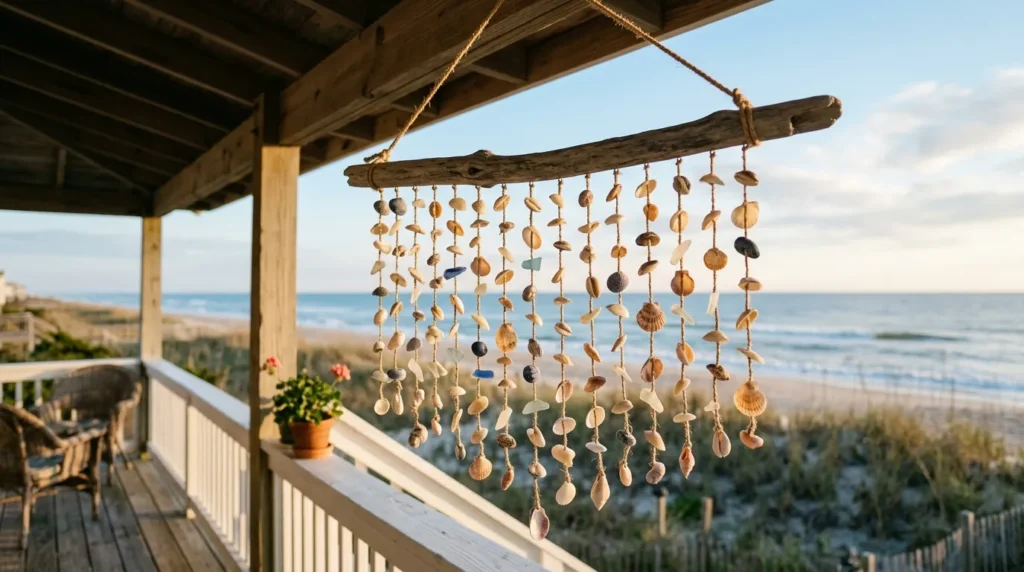
Quick Benefits
- Adds sound as well as visual interest to a porch or patio
- Uses smaller, broken, or less-than-perfect shells
- Inexpensive to make with basic string or fishing line
- Weather-resistant when properly sealed
- A satisfying project for using up leftover shell fragments
Why It Works One thing that works especially well with shell wind chimes is that they solve the problem of what to do with the smaller, chipped, or oddly shaped shells that don’t suit a photo frame or vignette. The soft, hollow sound shells make when they knock together is distinct from glass or metal chimes — quieter and more natural, which makes it a better fit for a relaxed outdoor seating area than a loud, tinny alternative. It’s also one of the few projects on this list that engages a sense beyond sight.
How To Style It Drill small holes in each shell using a fine masonry bit, or use a strong adhesive to attach shells to lengths of fishing line if you’d rather avoid drilling. Attach the strings to a driftwood branch or a simple wood ring, varying the lengths so the shells hang at different heights and create movement and layered sound. Space the strands a few inches apart so shells can knock against each other in a breeze without tangling. Hang it under a covered porch or eave to protect it from heavy rain, which will help the piece last through multiple seasons.
8. Shell Table Runners
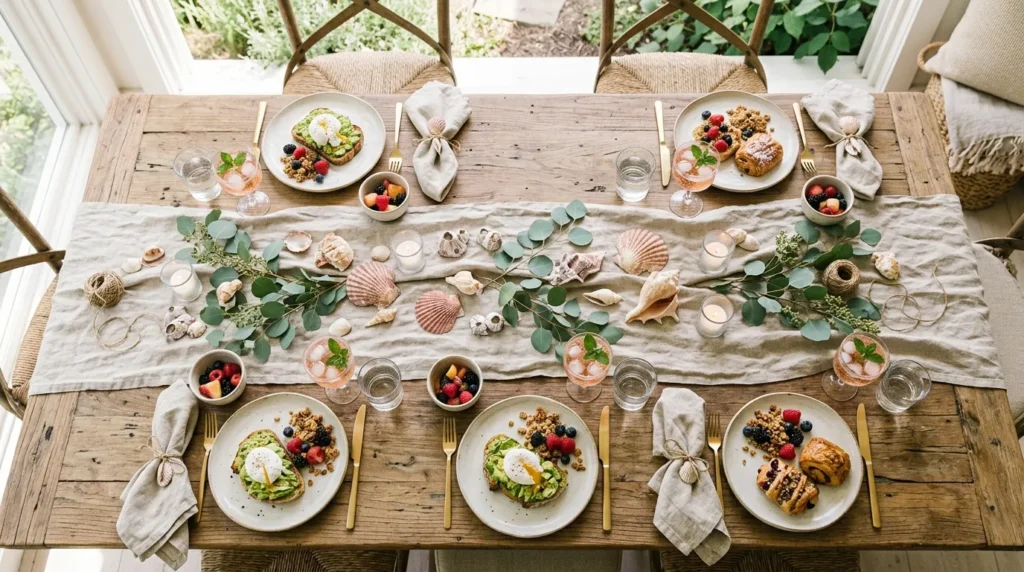
Quick Benefits
- Elevates warm-weather dinner parties and brunches
- No sewing or crafting skills required
- Reusable and easy to store flat
- Works with linen, burlap, or woven placemats as a base
- Pairs naturally with other projects on this list, like candle clusters
Why It Works If you’re anything like me, you probably already own a table runner that gets used for every occasion regardless of season. Adding a shell accent gives you a dedicated summer or coastal-occasion option without buying an entirely new textile. Shells arranged along the length of a runner create a natural, unfussy centerpiece that doesn’t block sightlines across the table the way tall arrangements do, which makes it especially practical for dinner parties where conversation matters as much as the table setting.
How To Style It Choose a natural linen or burlap runner in a neutral tone so the shells stand out without competing with the fabric. Rather than gluing shells directly to the runner, which limits reusability, simply arrange them loosely down the center, alternating with small votive candles, sprigs of eucalyptus, or a few pieces of driftwood. This keeps the runner washable and versatile for future use. For a more finished look, tuck a folded linen napkin with a shell napkin ring (see the next project) at each place setting to tie the whole table together.
9. Shell Napkin Rings
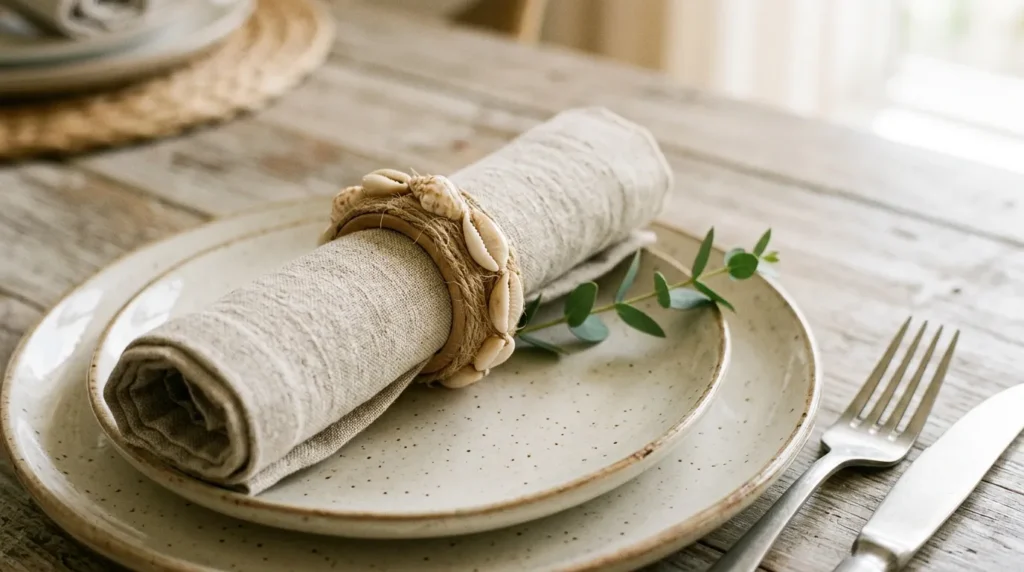
Quick Benefits
- A small detail that elevates an entire table setting
- Inexpensive to make in bulk for entertaining
- Works with cloth napkins in any color
- Reusable for multiple gatherings
- Easy to store between uses
Why It Works Small details are often what make a table setting feel finished rather than assembled at the last minute. I’ve noticed that guests tend to comment on these kinds of small touches — a napkin ring, a place card, a tiny sprig of greenery — far more than the centerpiece itself, likely because they feel personal and considered. Shell napkin rings are also one of the more budget-friendly ways to dress up a table, since a single ring uses only one or two shells.
How To Style It Attach a single flat shell to a plain wood, rattan, or metal napkin ring using a strong adhesive, choosing shells with a naturally flat underside so they sit securely without wobbling. If you don’t have blank napkin rings on hand, a simple loop of jute twine tied around a rolled napkin works just as well as a base. Vary the shell types slightly across the table rather than using identical ones at every place setting — a mix of scallop, clam, and small conch shapes feels more collected and less mass-produced.
10. Shell Planter Trim
Quick Benefits
- Refreshes plain terracotta or plastic planters
- Works for both indoor and outdoor plants
- Adds texture without competing with the plant itself
- A practical way to use larger, sturdier shells
- Weather-resistant when properly sealed
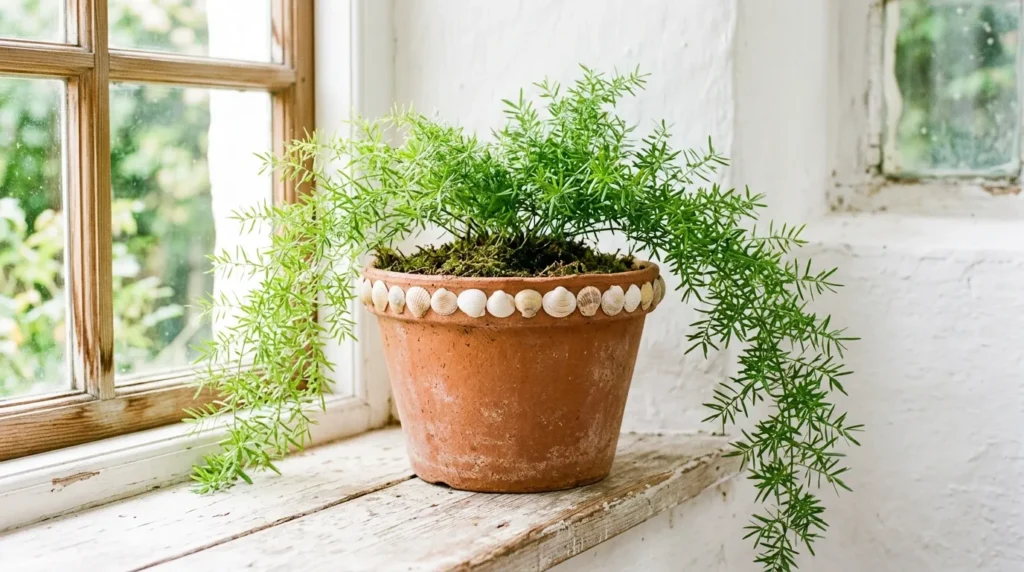
Why It Works A mistake many homeowners make with coastal decor is applying it only to purely decorative objects and overlooking functional ones like planters. Trimming a planter’s rim with shells brings texture into a part of the room that’s often overlooked, and it works particularly well with the kind of loose, textural plants — grasses, ferns, or trailing greenery — that already suit a relaxed, natural aesthetic. Because the shells sit along the rim rather than the body of the pot, the plant itself remains the visual focus.
How To Style It Select shells with a relatively flat edge so they sit flush against the rim of the planter, and use a waterproof adhesive such as E6000 or a marine-grade epoxy, especially for outdoor use where the pot will be exposed to moisture. Apply shells in a single row around the rim rather than stacking them, which keeps the look clean and prevents the trim from interfering with watering. This works especially well on planters housing rosemary, ferns, or ornamental grasses, where the loose, textured foliage echoes the organic shape of the shells below.
Frequently Asked Questions
Do I need to clean shells before using them in DIY projects? Yes. Even shells that look clean can carry sand, salt residue, or a faint odor. Soak them in a mixture of water and a small amount of bleach for about 15 minves, then rinse thoroughly and let them dry completely before gluing, painting, or drilling.
What’s the best glue for attaching shells to frames, mirrors, or planters? E6000 is generally the most reliable option for durability, especially in humid rooms like bathrooms or for outdoor projects. Hot glue works for quick, low-stakes indoor projects, but it can weaken over time in heat or moisture.
Can I use craft store shells instead of ones I collected myself? Absolutely. Craft store shells are pre-cleaned and often more uniform in size, which is helpful for projects like napkin rings or frames where consistency matters. Beach-collected shells tend to work better for projects where variety and imperfection add character, like vignettes or wreaths.
How do I keep shell decor from looking outdated or overly themed? Limit the number of shells in any single display, mix them with neutral natural materials like linen, wood, and rope, and avoid painting them bright, glossy colors. Restraint is what separates a tasteful coastal accent from a dated beach-theme look.
Are shell projects safe to use outdoors? Most are, as long as you use a waterproof adhesive and avoid leaving painted or unsealed shells in direct, prolonged rain exposure. Wind chimes and planter trim tend to hold up best outdoors, while painted ornaments are better suited to covered porches or indoor use.
How long do DIY shell projects typically last? With proper cleaning and a durable adhesive, most shell projects last for years indoors. Outdoor pieces like wreaths and wind chimes may need occasional touch-ups or shell replacement after a season or two of sun and rain exposure.
Where can I find shells if I don’t live near the coast? Craft stores, home decor retailers, and online marketplaces all sell bags of cleaned decorative shells in bulk. This is often the easiest option for anyone who wants to try these projects without a beach trip.
Conclusion
Shells are one of the most underrated materials in home decor, mostly because they’re so often relegated to a jar on a shelf instead of being used with any real intention. As these ten projects show, a small handful of shells can refresh a mirror, dress a dinner table, or bring texture to a planter without requiring a large budget or advanced DIY skills. The key, in my experience, is restraint — using shells as an accent rather than the entire design, and pairing them with natural materials like linen, wood, and rope so the result feels collected rather than costumed.
Start with one or two ideas rather than tackling all ten at once. A layered vignette or a set of painted ornaments is a low-commitment way to test whether this look suits your space before investing time in something larger, like a wreath or a set of napkin rings for entertaining. Over time, these small, natural touches add up to a home that feels warm, personal, and just a little sun-washed, no matter how far you live from the coast.
Related Articles
- Cozy Bedroom Ideas
- Small Living Room Layouts
- Modern Farmhouse Decor
- Neutral Home Styling
- DIY Accent Wall Ideas